Converting 93-96 Gauge Cluster Bulbs to LED
#1
Thread Starter
GTcars - Post God !
Joined: Sep 2003
Posts: 6,032
From: Macomb, Michigan
Rep Power: 896 


I didn't know exactly how to title this because there's more to it than a fancy name. Basically, this is a writeup if you have a 93-96 Camaro and you want to convert the "main bulbs" to LED (IE: The tach, speedo, and gauges, not the secondary "light up icons") Likewise, this may not work with stock gauges, as the stock gauges have a blue plastic backing on them which means red LEDs won't shine through.
Materials Needed:
194 wedge-style Inverted-Cone Wide Angle LEDs [I purchased from Superbrightleds.com]
Taking the gauges out is the most time consuming part of it. You'll have to remove the radio bezel, the knee bolster, the A-pillar, and the dash pad all just to gain access to the bolts to remove the gauge cluster bezel. The bolts are all 10mm as I recall. Once the cluster bezel is removed, there's 4 bolts that hold the cluster in place. Unplug the cluster, and take the gauges to your workbench or kitchen counter. You'll need a small torx tip to remove all the little screws from the black plastic cover that protects the circuit board on the back of the gauge cluster. Once that's removed, the real conversion begins.
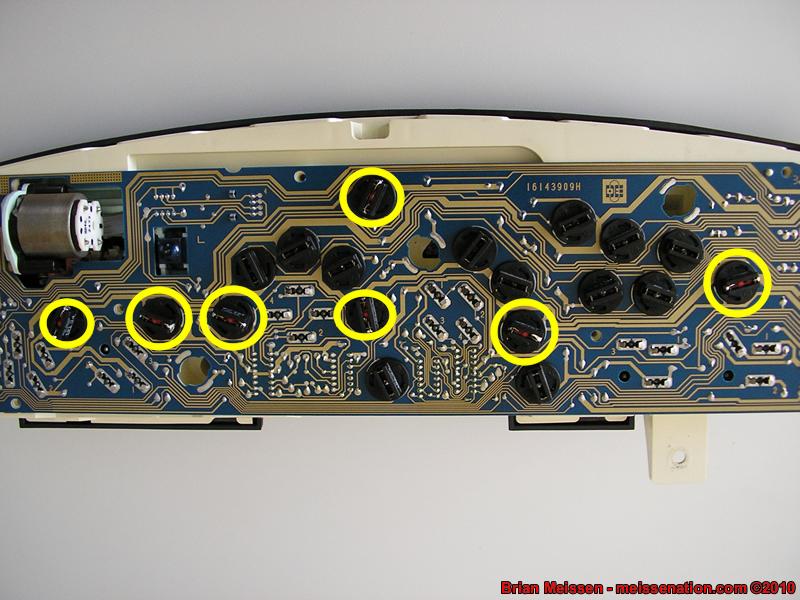
Once you have the black plastic cover off, you have perfect access to all the bulbs. These bulbs are meant to be replaced socket and all. Well, you only ordered 194 base LEDs [that's all you need], so here's the trick. Slip on a pair of rubber dish gloves, they'll not only give you extra grip, but protect you from bits of glass. With the gloves on, grib the base of the glass bulb and the plastic socket, and pull them apart. It doesn't take too much to break the bulb loose. Once you have removed the bulb, you now have a perfect socket for a 194 wedge bulb. Take your LED and bend the leads on them so they point down, instead of being against the base as they come. With the leads pointed down, insert the 194 wedge LED into the socket. Bend the leads to make contact with the metal strips on the sides of the socket. You'll need a soldering iron and solder to ensure a strong, secure connection between the lead and the metal. I tried just bending it, but that wasn't enough when I tested it.
Once your bulbs are soldered into place, simply plug them back in and go out to your car and test. Make sure you test first, before putting the black cover back on. The bulbs are polarized, so if a bulb doesn't turn on when you test the lights, twist the socket back out from the gauges and turn the socket 180 degrees and then try it again and it should light up. If not, check your solder joints. If everything lights up ok, then you've just gotten a great new LED-lit gauge cluster! Put it all back together and enjoy the new lights.
Bulbs to replace with the 194 wedge LEDs:
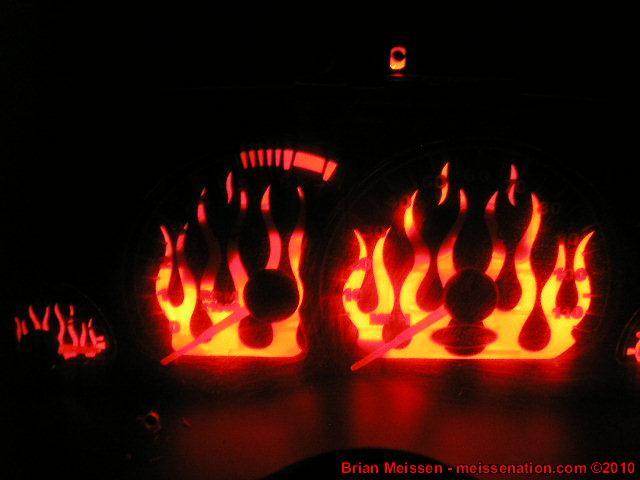
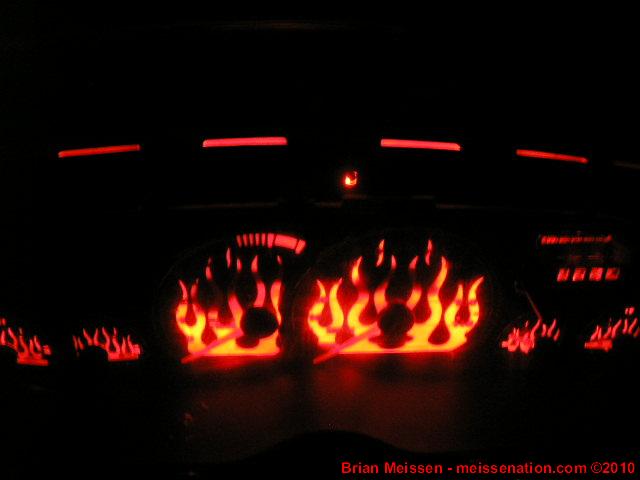
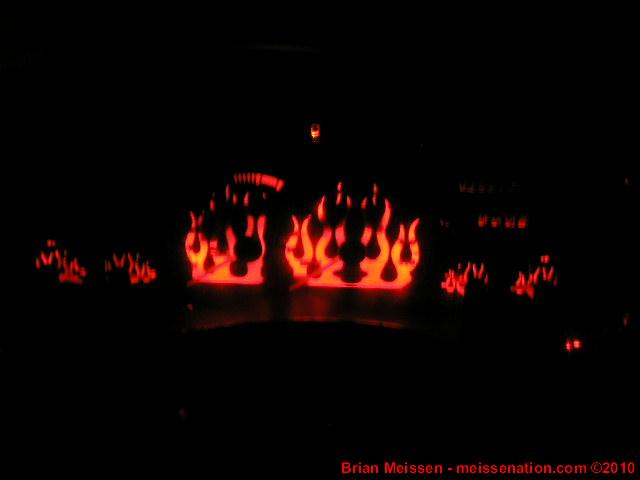
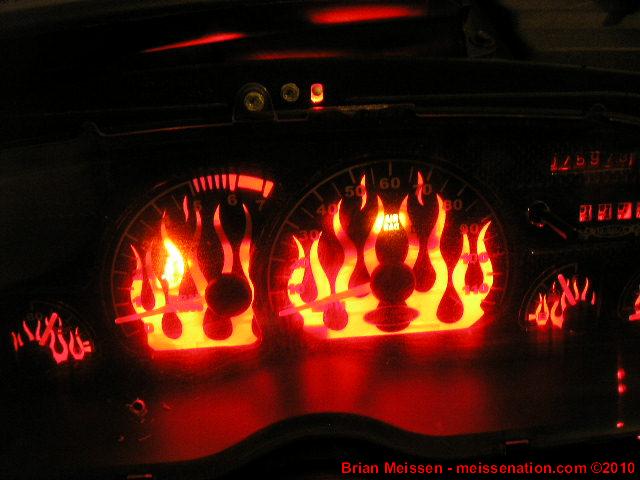
The results:






Materials Needed:
194 wedge-style Inverted-Cone Wide Angle LEDs [I purchased from Superbrightleds.com]
Taking the gauges out is the most time consuming part of it. You'll have to remove the radio bezel, the knee bolster, the A-pillar, and the dash pad all just to gain access to the bolts to remove the gauge cluster bezel. The bolts are all 10mm as I recall. Once the cluster bezel is removed, there's 4 bolts that hold the cluster in place. Unplug the cluster, and take the gauges to your workbench or kitchen counter. You'll need a small torx tip to remove all the little screws from the black plastic cover that protects the circuit board on the back of the gauge cluster. Once that's removed, the real conversion begins.
Once you have the black plastic cover off, you have perfect access to all the bulbs. These bulbs are meant to be replaced socket and all. Well, you only ordered 194 base LEDs [that's all you need], so here's the trick. Slip on a pair of rubber dish gloves, they'll not only give you extra grip, but protect you from bits of glass. With the gloves on, grib the base of the glass bulb and the plastic socket, and pull them apart. It doesn't take too much to break the bulb loose. Once you have removed the bulb, you now have a perfect socket for a 194 wedge bulb.
 Take your LED and bend the leads on them so they point down, instead of being against the base as they come. With the leads pointed down, insert the 194 wedge LED into the socket. Bend the leads to make contact with the metal strips on the sides of the socket. You'll need a soldering iron and solder to ensure a strong, secure connection between the lead and the metal. I tried just bending it, but that wasn't enough when I tested it.
 Once your bulbs are soldered into place, simply plug them back in and go out to your car and test. Make sure you test first, before putting the black cover back on. The bulbs are polarized, so if a bulb doesn't turn on when you test the lights, twist the socket back out from the gauges and turn the socket 180 degrees and then try it again and it should light up. If not, check your solder joints. If everything lights up ok, then you've just gotten a great new LED-lit gauge cluster! Put it all back together and enjoy the new lights.
Bulbs to replace with the 194 wedge LEDs:

The results:


#7
umm actually on the 97+ cars i know for sure they have a blue film.. its light blue and doesnt do much but.. how do you think the lights show up a bluish green color from the factory althgouh they are using white bulbs?? they do have a tint to them.. i replaced all of my interior lighting with white leds and due to the slight tint of the true white led light and the slight blue tint from the film they actually showed up a kind of funky baby blue color that i didnt like too much.. now im going back and replaicng everything with blue leds.. looks amazing..
when i take mine all apart again soon ill get pics of the bulbs to change etc. for the 97+ gauges as well as the proper wiring for replacing the rest of the interior lights..
i am also working on a set-up for putting leds into the map lights in the rear view mirror and the dome light so that they would all shine brighter and true white..
the leds are also very directional.. so when installing it you can make sure your getting light exactly where you want it to go..
i am still looking for some 3mm or 5mm (preferably 5mm for the dome) very very wide angle LEDS if anyone knows a good source itd be appreciated..
#8
Just did mine in blue 
And wow, solder doesn't like to stick to those tabs does it? lol
Redid my needles while I was at it, but got 'em too dark to see at night, so gonna strip 'em back down and give it a shot of chrome on the underside and see what that looks like.

And wow, solder doesn't like to stick to those tabs does it? lol
Redid my needles while I was at it, but got 'em too dark to see at night, so gonna strip 'em back down and give it a shot of chrome on the underside and see what that looks like.
Thread
Thread Starter
Forum
Replies
Last Post
VindiCated
Car Parts For Sale
1
10-14-2007 05:40 PM
Gs-R-edline
Car Parts For Sale
1
10-05-2007 09:37 PM
egcivic4dr
Car Parts For Sale
0
07-02-2007 07:19 PM
Currently Active Users Viewing This Thread: 1 (0 members and 1 guests)


